

This lesson is made with PSPX9
But is good with other versions.
© by SvC-Design
Materialen Download :
Here
******************************************************************
Materials:
10_Vector_P1_Animabelle.png
Black&White1Soxiki.PspSelection
Black&White2Soxiki.PspSelection
Black&WhiteSoxikibem.f1s
decorBW1Soxikibem.png
Preset_UserDefinedFilter_Foil engrave.PspScript
tituloBWBSoxiki.png
verlaine 11.pspimage
******************************************************************
Plugin:
Plugins - Italian Editors Generatore - Pattern Wipe Schiu
Plugins - Alien Skin Eye Candy 5 - Impact > Glass
******************************************************************
color palette
:

******************************************************************
methode
When using other tubes and colors, the mixing mode and / or layer coverage may differ
******************************************************************
General Preparations:
First install your filters for your PSP!
Masks: Save to your mask folder in PSP, unless noted otherwise
Texture & Pattern: Save to your Texture Folder in PSP
Selections: Save to your folder Selections in PSP
Open your tubes in PSP
******************************************************************
We will start - Have fun!
Remember to save your work on a regular basis
******************************************************************
1.
Choose 2 colors to work with:
Foreground: #000000
Background: #ffffff
2 .
Open a new transparent image of 850x500 pixels
Paint with white color.
3.
Layers - New Raster Layer.
Paint this transparency with a Rectangular gradient formed by the chosen colors.

4.
Effects - Image Effects - Seamless Tiling.

5 .
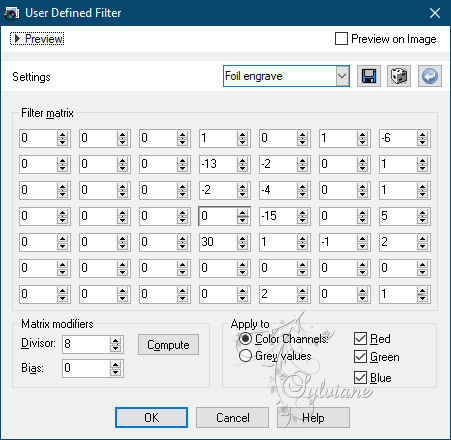
Effects - User Defined Filter - Foil engrave
6.
Layers - Duplicate.
Image - Mirror - Mirror Horizontal.
Effects - Distortion Effects - Wave

Effects - Edge Effects - Enhance.
Layers - Merge - Merge Down.
7.
Layers - Duplicate.
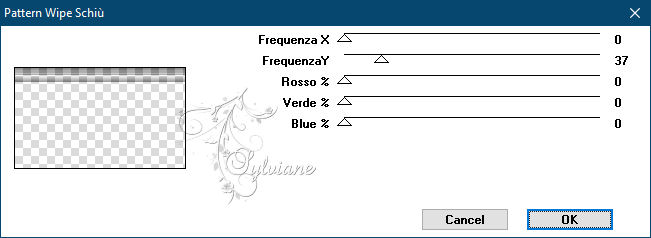
Plugins - Italian Editors Generatore - Pattern Wipe Schiu
With the Magic Wand: Feather and Tlerance tool at 0, select the blank part.
Press the Delete key on the Keyboard

Selections - Select None.
8.
Objects - Align - Center in Canvas.
Layers - Duplicate.
Activate selection tool (Press K on your keyboard)
And enter the following parameters:
Pos X :0 – Pos Y : 309
Press M.
Layers - Merge - Merge Down.
With the Magic Wand: Feather and Tolerance tool at 0, select in the middle of these two lines

9.
Layers - New Raster Layer.
Paint with the color of the foreground.
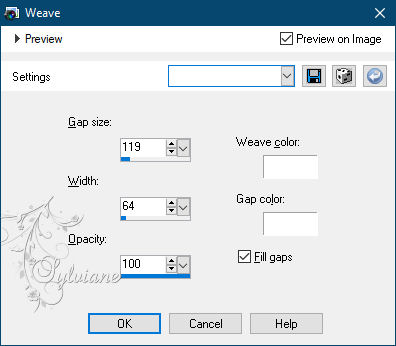
Effects - Texture Effects - Weave
10.
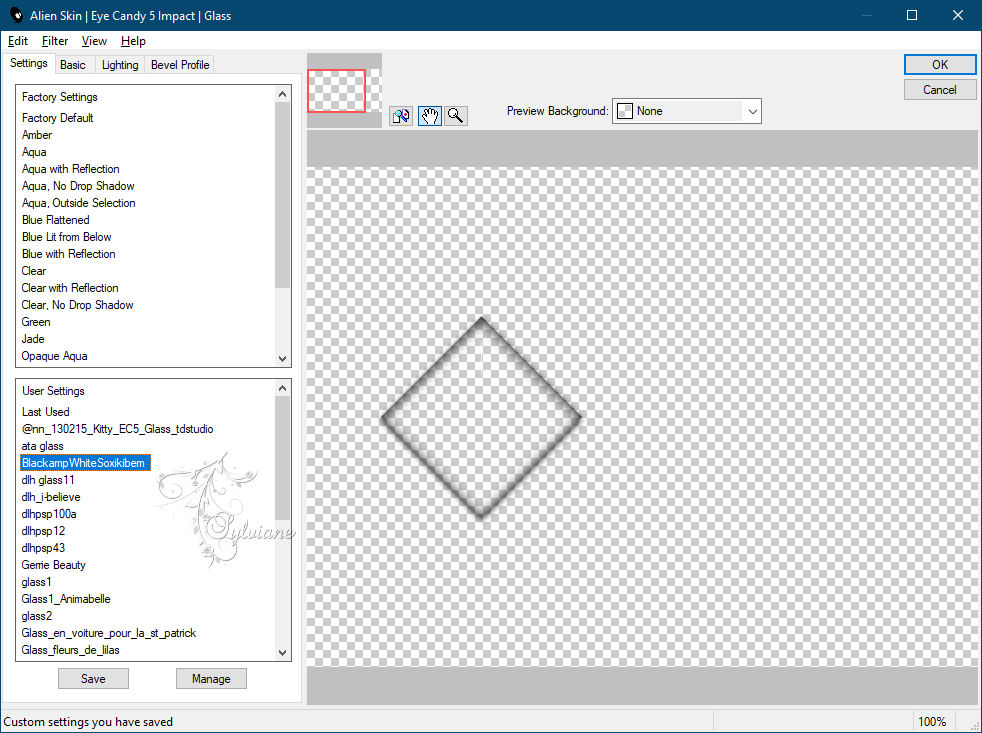
Plugins - Alien Skin Eye Candy 5 - Impact > Glass: Black&WhiteSoxikibem.f1s.

Note: Double-click the Black&WhiteSoxikibem.f1s file to install the effect within the Alien Skin plugin:
Selections - Select None.
Layers - Merge - Merge Down
Activate selection tool (Press K on your keyboard)
And enter the following parameters:
Pos X : 0 – Pos Y : 211
Press M.
11.
Layers - New Raster Layer.
Selections > Load/Save Selections > Load Selection From Disk: Black&White1Soxiki

Paint the Selection with the background color.
Selections - Modify - Contract: 20.
Paint the selection with the color of the foreground.
Selections - Select None.
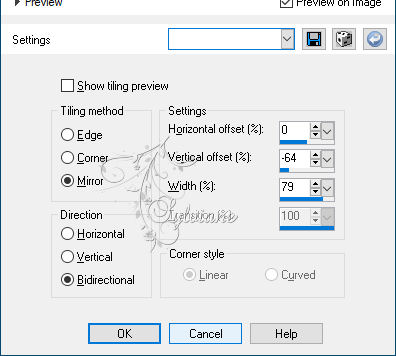
12.
Effects - Image Effects - Seamless Tiling
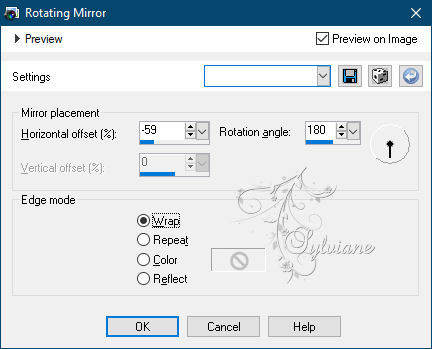
13.
Effects - Reflection Effects - Rotating Mirror
14.
With the Magic Wand: Feather and Tolerance tool at 0, select as indicated
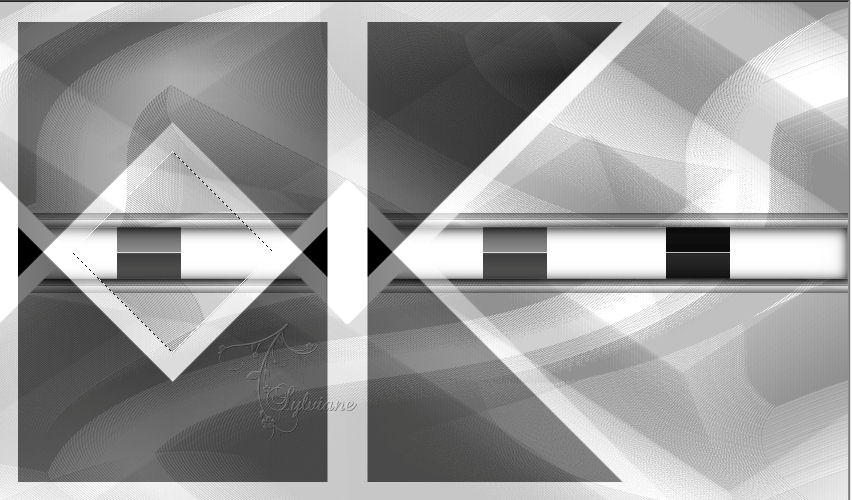
Activate Layer Copy of Raster2.
Press the Delete key on the keyboard.
Selections - Select None.
15.
Activate the Raster 3 layer.
With the Magic Wand > Mode: Add(Shift) - Feather and Tolerance tool in 0,
select as indicated
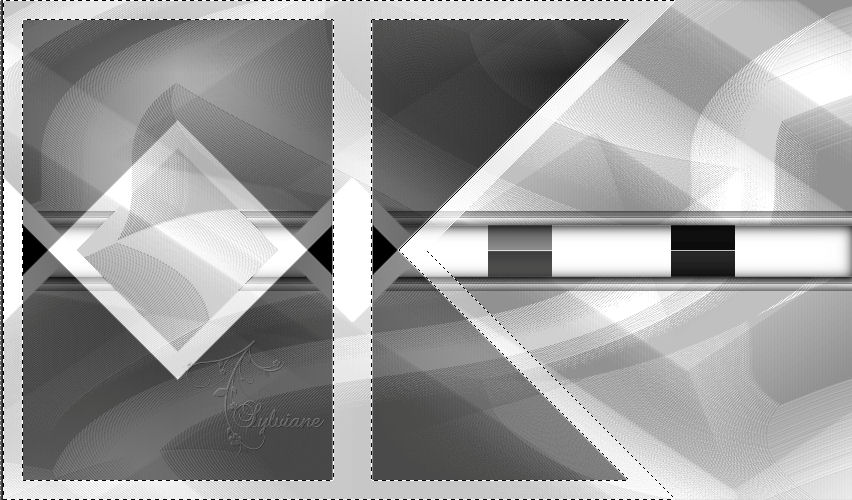
Activate Layer Copy of Raster2.
Press the Delete key on the keyboard.
16.
Activate Layer Raster 3.
Effects - 3D Effects - Cutout

Selections - Select None.
17.
Open 10_Vector_P1_Animabelle.png
Edit - Copy
Edit - Paste as New Layer.
Image > Resize: 40%, all layers cleared.
Adjust - Sharpness - Sharpen.
Activate selection tool (Press K on your keyboard)
And enter the following parameters:
Pos X : 10 – Pos Y : 200
Press M.
Layers - Arrange - Move Down.
Effects > 3D Effects > Drop Shadow:
1/ 1/ 80/ 5 - color: #000000
18.
Activate Layers Raster 3.
Open decorBW1Soxikibem.png
Edit - Copy
Edit - Paste as New Layer.
Activate selection tool (Press K on your keyboard)
And enter the following parameters:
Pos X :70 – Pos Y : 223
Press M.
19.
Layers - New Raster Layer.
Selections > Load/Save Selections > Load Selection From Disk: Black&White2Soxiki

Plugins - Alien Skin Eye Candy 5 - Impact > Glass: Black&WhiteSoxikibem.f1s
20.
Open the main Tube.
Edit - Copy
Edit - Paste as New Layer.
Position your choice.
Effects - 3D Effects - Drop Shadow as you prefer.
Note: I used a Verlaine tube that already had a shadow.
For this work I colored the tube for black and white
and I applied the Nevoa mask to fit the job better.
21.
Open tituloBWBSoxiki.png
Edit - Copy
Edit - Paste a New Layer.
Activate selection tool (Press K on your keyboard)
And enter the following parameters:
Pos X : 605 – Pos Y :124
Press M.
22.
Effects - 3D Effects - Drop Shadow:
1/1/ 100 /0, color: #FFFFFF
23.
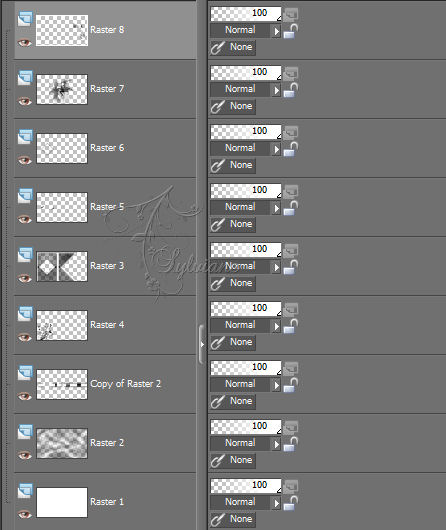
Check the position of the layers
24.
Image - Add Borders – Symmetric - 1px - foreground color
Image - Add Borders – Symmetric - 3px - background color
Image - Add Borders – Symmetric - 1px - foreground color
Image - Add Borders – Symmetric - 20px - background color
Image - Add Borders – Symmetric - 1px - foreground color
Image - Add Borders – Symmetric - 10px - background color
Image - Add Borders – Symmetric - 1px - foreground color
Image - Add Borders – Symmetric - 30px - color background
Image - Add Borders – Symmetric - 1px - foreground color
25.
Apply your watermark or signature.
Save as JPEG
Back
Copyright Translation © 2021 by SvC-Design